Perhaps I was inspired to do this post from the clever name of the salad place near where I work-- "Lettuce Turnip the Beet", or maybe it was just because my roommate bought some beets and we needed something to do with them. Anyway, this post is about beet gnocchi. Handmade gnocchi is one of my favorite dishes to make, mostly because there are so many ways to make it-- with regular potatoes, sweet potatoes or beets! And also because the final product is quite delicious. This was a great meal to make in college because, like pasta, it did not require many ingredients. The gnocchi itself is just beets, flour and an egg.
The time is takes to prepare this meal depends upon how many people you are cooking for. The total prep and cooking time for 4 diners was about 2 and a half hours. If you are cooking for more than 4, plan on taking more prep and cooking time, since you will be making more gnocchi and it will take longer to cook them all. This may not be the best meal to cook if you have a lot of guests. We learned that the hard way one time in New Orleans, when we decided to be liberal with our dinner invitations and ended up hand rolling sweet potato gnocchi for about a dozen guests.
For this particular meal, I modified a beet gnocchi recipe I know to make it dairy-free, because I was cooking with a friend who does not eat dairy. The meal can also be modified even further to be completely vegan by simply not using the egg. I usually use eggs in all of my gnocchi recipes, but it is not necessary. I paired the gnocchi with a sage walnut garlic paste, a dairy-free version of a sage butter sauce. The paste ended up being similar in texture to a pesto sauce and is much healthier than the butter sauce.
To serve 4 people, here's what you need for the gnocchi:
3 medium sized beets, 3-4 cups of flour, 1 egg (optional), nutmeg, salt and pepper (to taste)
And for the sage walnut garlic paste:
1/4 cup of olive oil, 15-10 chopped sage leaves, 1/4 cup of chopped walnuts, 4 cloves of garlic, salt and pepper to taste
The first step of making the gnocchi is to cook the beets. There are multiple ways to do this, you can bake them in the oven, or you can boil them. What I did was a sort of combination of the two. First, preheat the oven to 375 degrees. Then, cut off the leafy bits of the beets, and put the beets upside down in a baking dish. Brush the beets with some olive oil, salt and pepper and put about 1/4 of an inch of water at the bottom of the dish. Cover the baking dish tightly with foil. Here is where some improvisation was necessary for me, because I had run out of foil. This is a tragedy of the commons type of scenario I ran across a lot as a college student-- everyone wants to use the tinfoil, but no one wants to replace it. But it makes for more creativity in cooking. Instead of tinfoil, I just used another baking dish to cover the botton dish. It worked perfectly for me. Cook the beets for about an hour, or until tender. To test for tenderness, I stuck a fork in on the beets as far as it would go, and made sure it came out easily.
While the beets are in the oven, you have an hour of downtime, which you can use to prepare the paste. Just chop up the sage, walnuts and garlic, combine them with the olive oil, and put it aside. I chopped everything very small, so that the paste would be like a pesto, but you can chop them to any size you want to alter the texture. You can also food process everything together instead. I don't currently own a food processor, so I am forced to chop everything old school style, but I actually like the slightly chunkier bits for this paste and other pesto sauces that comes from chopping by hand.
Preparing the paste does not take the entire hour that the beets are cooking, so this is the point in the recipe when I usually open a bottle of wine. I was drinking a California Chardonnay while cooking and eating this meal, which I think went well with the beet gnocchi. It would probably go especially well with the sage butter sauce, since the buttery Chardonnay and the sauce would match each other in richness.
Once the beets are done cooking, wait for them to cool a bit, and then peel off the skin. At this point the skin should be soft enough to peel off using a butter knife and your fingers. Just a warning, since the beets have a very rich, red color, I would definitely recommend wearing an apron or clothes that you do not particularly care about while peeling and mashing the beets. There is definitely some potential for staining in the next couple of steps. Once the beets are peeled, cut them into 1 or 2 inch pieces and put them in a large mixing bowl to mash. If you have a potato masher, you can use that, or what I did was just use a fork. If you want to get fancy, you can use a food processor to puree the beets as well. But honestly, just a plain old fork worked perfectly for me.
After you have pureed the beets (in whichever way you chose to), add the egg, nutmeg, salt and pepper. Make sure that before you add the egg, the beets are completely cooled, otherwise the egg may cook in the beets. By the time I had peeled and mashed the beets, they were cool enough to add the egg, so it really does not take too long for the beets to cool. It took much less time for the beets to cool than for potatoes to cool when I have made potato gnocchi. I just added a pinch of nutmeg, salt and pepper after the egg. Altogether, I had about 1 and a half to 2 cups of beet puree before adding the flour.
Now for the flour! In total, I probably added about 3-4 cups of flour to the beet puree. Begin by adding a handful of flour at a time, and mix the flour into the puree with a wooden spoon. Continue to add flour until the dough is no longer sticky. This direction is vague, but what I mean is add flour until you can pick up the dough in pieces and roll it out. As you are adding flour, and feeling the dough, you will get a sense of when it is ready. You do not want to add too much flour, or your gnocchi will taste floury, and if you don't have enough flour, you won't be able to work with the dough.
Once you have finished the dough, it may be a good time to begin heating up a pot of water for cooking the gnocchi. Use a medium or large pot, and fill about half way with water.
When your dough is ready to roll out and form the gnocchi, flour a work surface, grab a handful of the dough, and roll it out into a log shape, about an inch thick. Next, take a sharp knife and cut the log into 1/2 inch pieces. Once you have cut the pieces, take each piece, and press it against the bottom of the prongs of a fork. Then, take your fingers and gently roll the piece of gnocchi forward, to create a sort of pool on one side of the gnocchi. This is meant to hold the sauce. On one side of each piece of gnocchi, there should be light fork marks, and on the other side there should be a little indent. This is probably the most difficult part of the recipe, and may take some practice. Even if the gnocchi does not look perfect, it will still taste great. Repeat these instructions for all of the dough, and set each piece of gnocchi aside on a plate. Do not pile the gnocchi on top of each other, because they are delicate and may stick together.
After you have formed all of the gnocchi, it is time to begin cooking the gnocchi. The temperature of the water is very important for cooking gnocchi. Once the water is boiling, add only a few pieces of gnocchi at a time, maybe about 6-8 pieces. Adding too much gnocchi will lower the temperature of the boiling water. When the gnocchi is done cooking, they will rise to the top of the water. This takes about 3 minutes. As the pieces finish and rise to the top, scoop each piece out with a slotted spoon and set aside in a large bowl or a colander. Continue, with only about 6-8 pieces of gnocchi in the water at a time until you have cooked all of the gnocchi.
Next, plate the gnocchi and drizzle the sage walnut garlic paste on top of each plate. Since I am not dairy-free, I added some freshly grated parmesan cheese to my dish. Pour yourself a glass of wine and enjoy!
Showing posts with label Italian Cuisine. Show all posts
Thursday, August 1, 2013
Friday, July 19, 2013
Stuffed Pasta (Or, how to impress for just a little bit more)
Earlier we explained why pasta is a great, low-cost entree for a large dinner party, guaranteed to please and simple enough to prepare by hand. What if you want to take it up a notch, though? For a slightly more impressive meal, stuffed pastas make a striking centerpiece. They remain low-cost (depending on the filling one selects), and once again are palatable to even the pickiest eaters.
Before embarking on a pasta-stuffing voyage, do consider time: once you’ve got the dough assembled plan to spend at least a minute on each individual tortellino, raviolo, or capelletto. That doesn’t sound like much until you calculate, say, six ravioli a piece for ten guests - you’re spending an hour on assembly! In terms of hosting, then you have two options:
1. Prepare in advance and set them aside before cooking. This is the best approach for a formal dinner, or for an event that will require you to interact with guests before the meal (shaking hands is awkward when you’re covered in flour). Then, escape for a mere three minutes, throw them in the boiling water, and voila!
2. Make it a pasta-stuffing party: if it’s an informal affair and your guests are fun-loving types, it will be so much fun to prepare the dinner as a group. We certainly found this to be true when cooking for our friends at Tulane: leading the busy, glamorous lives that we did (haha), we inevitably ran late while preparing meals; the more punctual guests might arrive before we’d even started! Asking them to help in the kitchen sped up the process, while also distracting them from their rumbling stomachs. While the maxim “too many cooks spoil the stew” is certainly worth remembering, the assembly-line nature of pasta stuffing benefits from as many sets of (competent) hands as possible. Chances are your guests will feel very proud to have participated, adding to the overall satisfaction of the evening.
We both agree that the shape of a pasta determines the nature of the dining experience it produces. The ways in which the dough is folded and stuffed are almost as numerous as those in which it may be cut.
As a casual diner, you could amuse yourself for hours experimenting with all the possible shapes. When hosting, however, given that the presentation can transform a commonplace meal to into an unforgettable one, it’s worth devoting some thought to form. Here are a few shortcuts for deciding on a shape:
1. What will your guests be wearing? It would be embarrassing (and potentially inflammatory!) to invite your boss over for dinner, only to have ricotta cheese explode on his Rolex. Larger pastas, such as ravioli or agnolotti, are more likely to burst and become messy. They are also more awkward to transport to the mouth in bite-sized pieces. Tiny tortellini or capelletti, which have much less filling and are often already bite-sized, facilitate a composed, formal meal. Larger pastas can certainly be elegant when presented correctly, so if you do opt for this route when hosting a formal dinner at least make sure each diner is equipped with a sharp knife and a lap napkin.
2. What kind of filling will you use? Possibilities abound, but many of the most exciting flavors carry with them unmanageable texture. Consider ravioli di pesce - while flaky white fish in a buttery lemon sauce make a scrumptious filling, this is difficult to fold into tiny tortellini, or any other more twisted form. Smaller pastas can be stuffed with certain very finely ground meats, but in general these are better showcased in the central pouch of ravioli or agnolotti. Conversely, a simple cheese-based filling may really shine in a tightly wrapped nugget. And stronger flavors, such as tartufo or gorgonzola, are better in dime-sized quantities.
3. What kind of sauce will you prepare? The centrality of the interaction between pasta shape and sauce is well acknowledged - in fact, that’s the inspiration for many creative forms (gnocchi, for example, have a central indentation designed to catch sauce). There is nothing more awkward than finishing one’s meal by scooping residual sauce up like soup because the pasta didn’t hold it. For thinner, slippery sauces, therefore, select a convoluted or twisted shape - the more indentations, the more opportunities to catch pockets of sauce. For a thick sauce or one with substantial texture, prepare large or simple shapes that can be cut and layered into the sauce on a fork. In the image below, for example, these large sweet potato mascarpone ravioli are more filling than dough; this soft texture contrasts well with the parmesan sauce that has melted into a crisp layer on top.
4. What shape are your dishes? This may seems arbitrary, but not if you want to wow your guests. Typically, triangular or quadrilateral pastas can be arranged most artfully in oval or circular dishes; rotund pastas contrast well with square plates; tiny tortellini fit comfortably in bowls.
Assembly is completely a matter of time. The more time you have, the easier it is to devote ample attention and care to each little fold and crease of your pasta. Consider each as a work of art deserving of all the love you would give your firstborn child (really!).
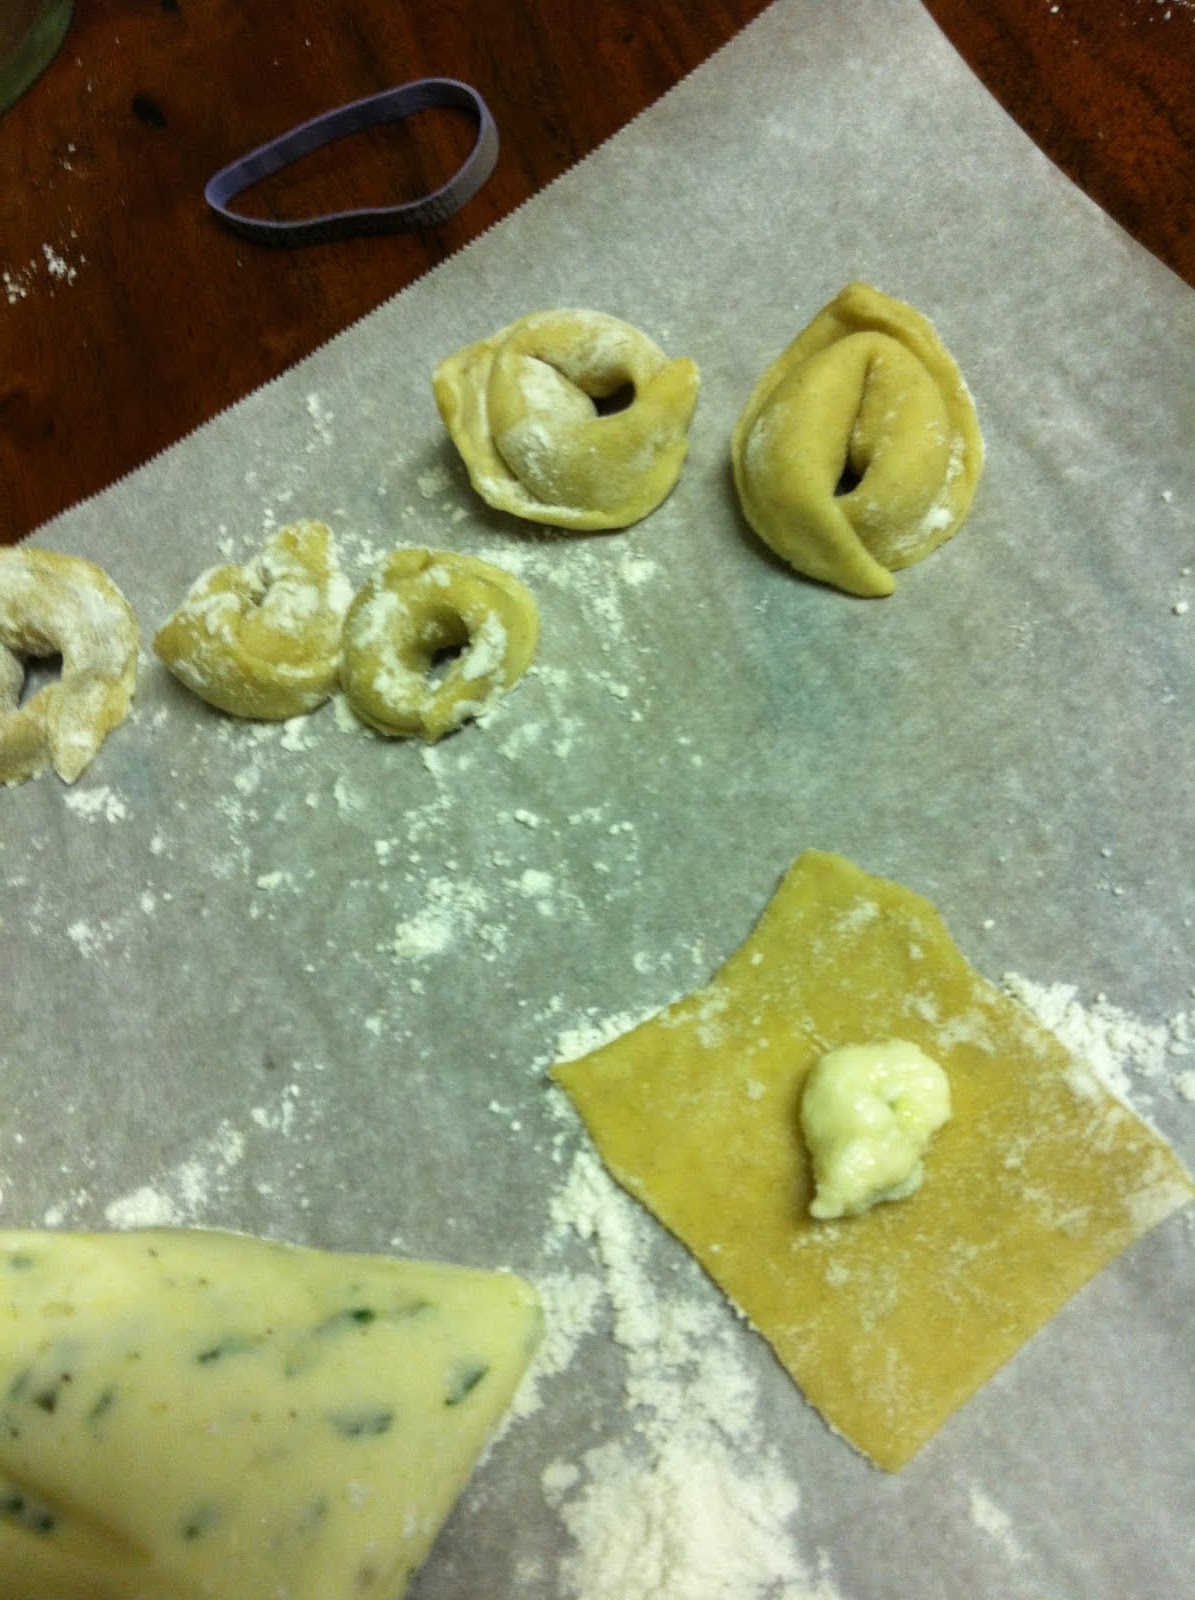
The possibilities for fillings are countless; really anything that will be firm enough to fit on a fork but soft enough to conform to the pasta’s shape will work. Here I’ve photographed a ricotta-based filling with parmesan, chopped parsley, and garlic (the last two ingredients can be sauteed for several minutes to soften their flavor).
This filling can be mixed up in minutes and due to its consistency can be piped into the pasta, a technique that helps standardize portions. Fill a ziplock bag and snip of one of the corners.
When it comes to deciding how much filling to use, less is more. This is because the edges need to be tightly sealed to avoid leakage during boiling. Begin by piping on half the amount you think is necessary; if you are able to seal that in satisfactorily try a little more on the next one.
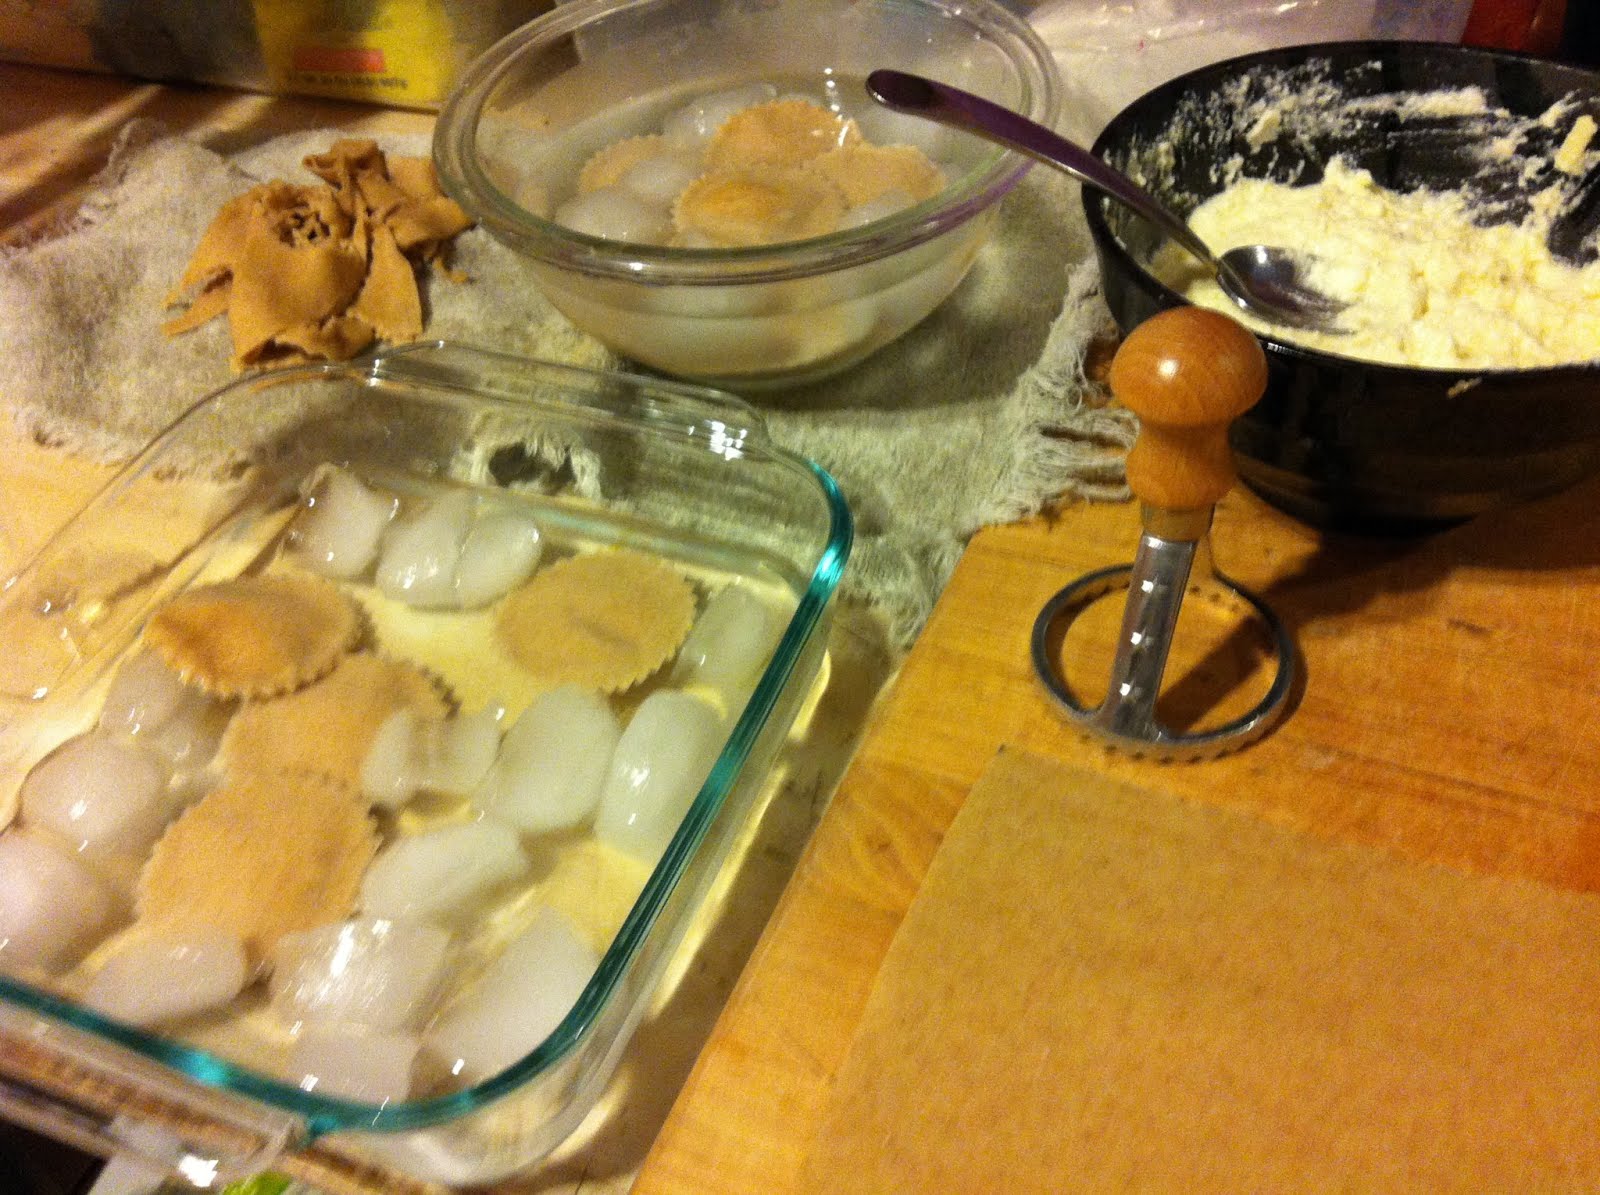
If you plan to cook the pasta immediately, set them in a dish of ice water before boiling. This firms them up to reduce the risk of rupture while boiling. If you plan to wait a while, place them in the freezer on a dish until they are firm enough not to loose their shape; then tumble them all into a plastic bag and seal it tightly. Avoid letting your guests see you take it out of the freezer, however: even if the pasta was hand-made to begin with, a frozen meal never gives the impression of fine dining.
These cook just as quickly as other stuffed pastas, which compounds their ability to make you, the chef, shine: not only do you know how to prepare a dish that many find intimidating, you can also do so with speed! Remove them gently from the boiling water with a slotted spoon rather than pouring them into a strainer, to avoid the risk of rupturing. If it is a small enough party, we recommend arranging the pastas with deliberation on each individual’s dish. This gives you the opportunity to add that extra bit of flair - and artful drizzle of sauce, an herb sprig, a dollop of glistening butter - that makes your guests feel they are indulging in truly haute cuisine.
| Ricotta Ravioli with Pistachio Sauce |
Subscribe to:
Posts (Atom)